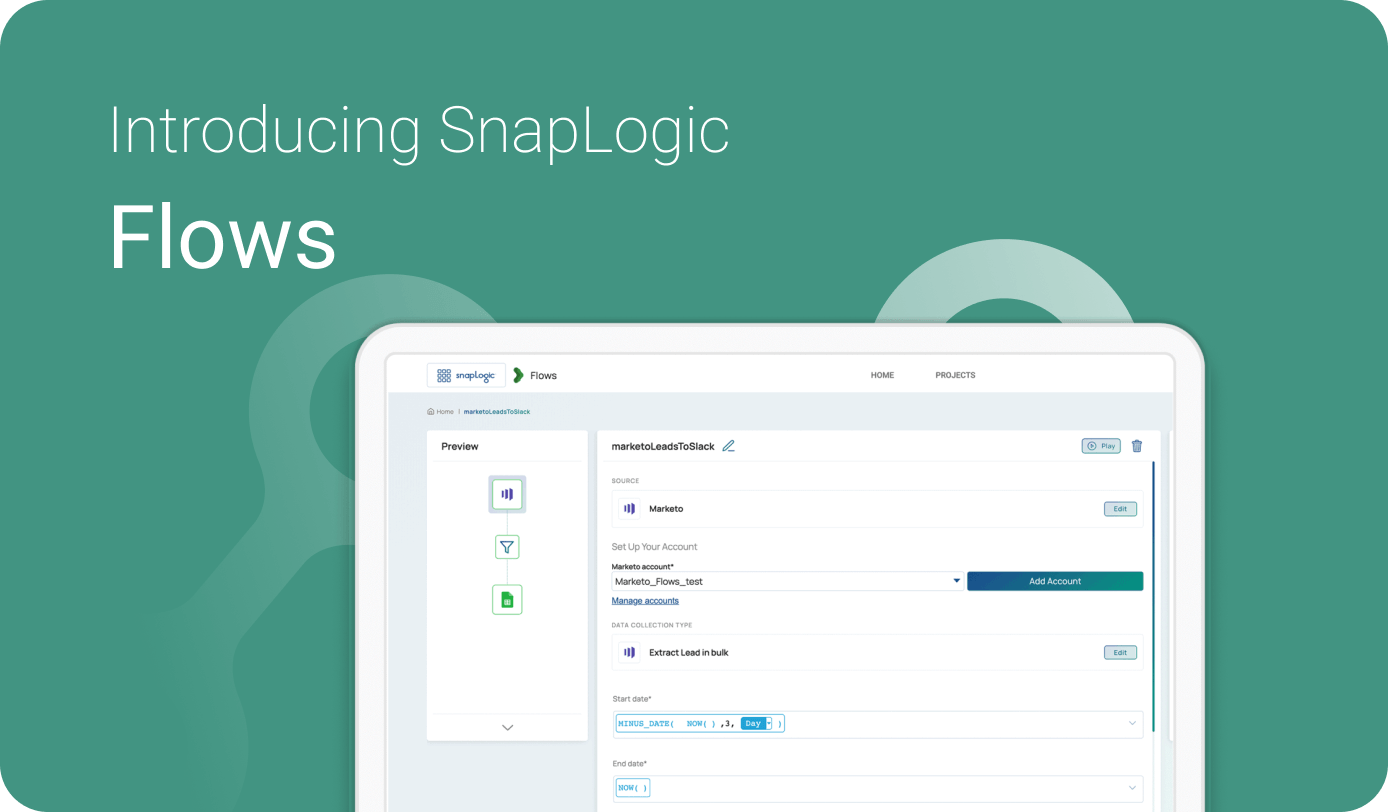
For marketing ops and sales ops teams in B2B companies, importing leads into a CRM system is one of the most common business processes. With the variety of channels your marketing team leverages, and the manual nature of list importing, this can be a painful workflow for your team. SnapLogic Flows will help to make the entire process easier for you and your team. You can now automate sales and marketing processes without writing code and without help from IT.
SnapLogic Flows enables you to build a wide range of workflows that spans sales and marketing endpoints such as Marketo, cloud storage endpoints such as Box, service endpoints such as ServiceNow, and notification endpoints such as Email and Slack in just a few easy steps:
- Select your source (spreadsheet or Google Sheet)
- Select the fields, filter records as needed
- Pick a target for your data (Salesforce or similar)
- Easily filter and map your data
- Schedule it or run it immediately
It’s that easy! Here’s how the process works in a little more detail.
For example, we’ll look at how you can automate a simple lead list upload into Salesforce.
In this example, I have a leads file in a Google Sheet. When you click on the ‘New Flow’ button in your Flows home, you are taken to the build interface.

On the left, you get an overview of the integration that you are building. The center panel is where you configure the endpoints. You have a support guide on the right, which provides convenient context-specific help.

The first step is to configure the source endpoint, which is Google Sheets. Once you pick an account, the platform introspects the endpoint and presents you with a list of Google Sheets to source data from.
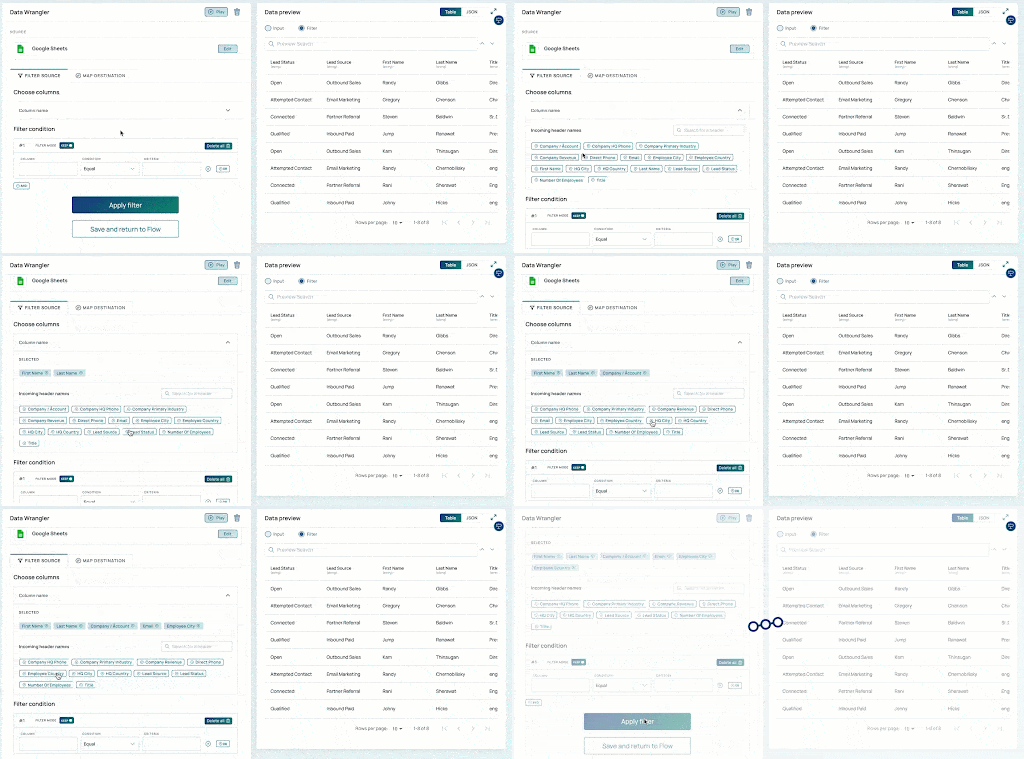
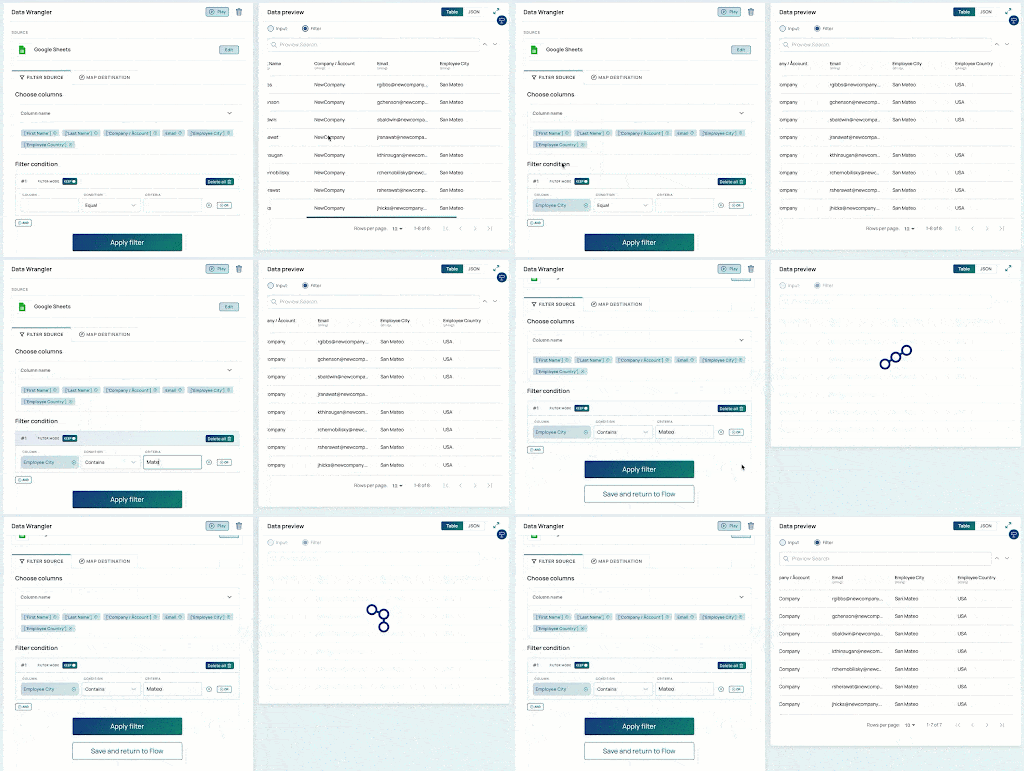
The next step is to filter the source data. When I click on the ‘Filter Data’ button, I am taken to the ‘Data Wrangler’ screen dedicated to data transformation and mapping. In this case, I don’t want all the columns in the source sheet, so I click to pick the six columns that I want. Because Flows is built on SnapLogic Intelligent Integration Platform, it leverages a lot of the dynamic features of the platform that improve user productivity such as endpoint introspection and data preview. On the right, you get a preview of the input data and filter data. You can also filter rows based on arithmetic and string expressions.
Once you have filtered the source data, you can then connect the source to the target app.
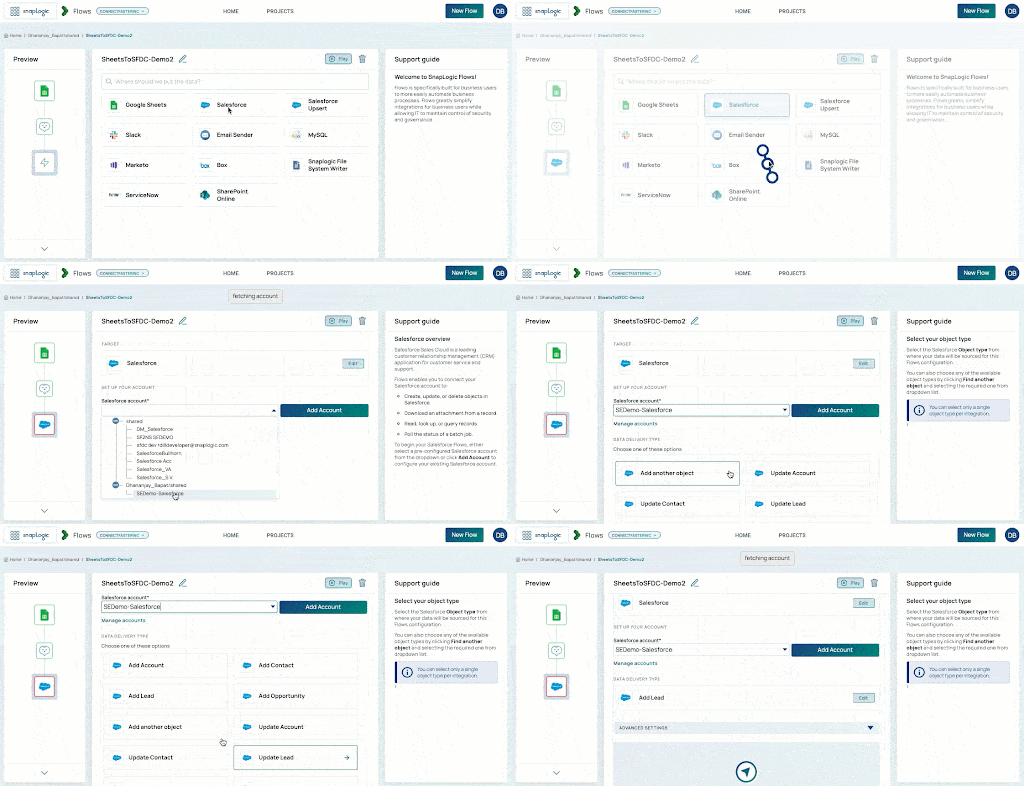
The next step in automating this workflow is configuring the Salesforce target. Once you select ‘Salesforce’ as the target, the platform provides a list of commonly used objects (Accounts, Leads, Opportunities, Contact) and actions (Add, Update, Delete) to you. The support guide updates to present you with relevant help as you move through different screens.
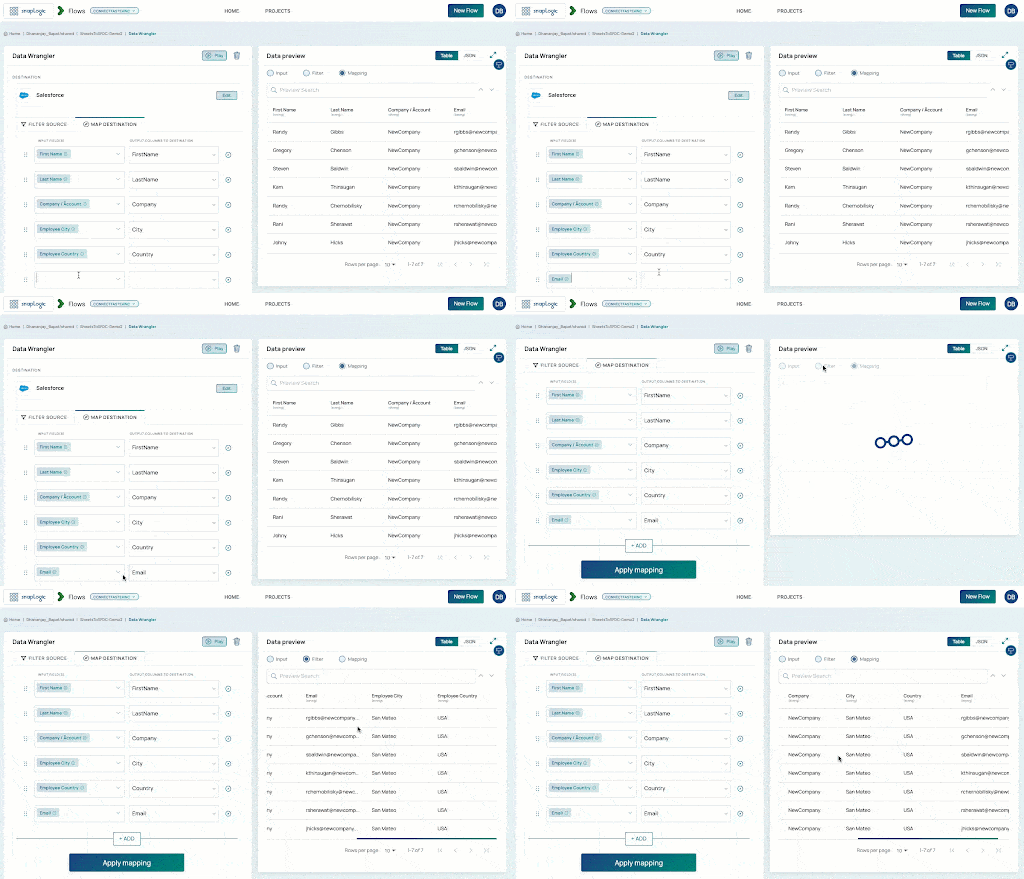
The last step is mapping data from my filtered Google Sheets source to Salesforce. For mapping, you are again directed to the Data Wrangler, which is what you use for field mapping. The platform provides suggestions and informs you of data types by introspecting both the source and the target schema. Once you apply the mapping, you can see the preview on the right-hand side of the screen.
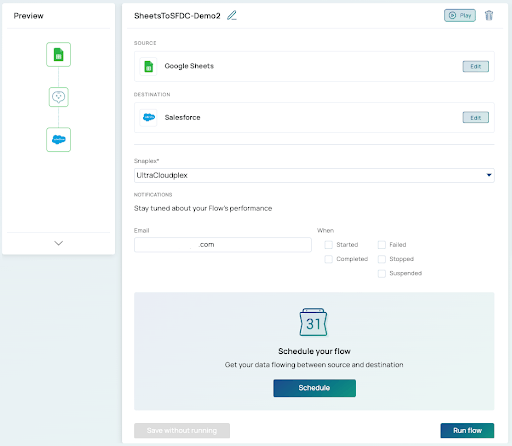
Now that you have mapped Google Sheets as a source to your destination, you can click on ‘End Flow’. In the final step, you are taken to the end screen where you can preview what you configured, and run your Flow. You can configure notifications and choose to get notified if the Flow is completed or failed or stopped/suspended and schedule a Flow in advance.
In just a matter of minutes, you can automate a sales or marketing workflow such as uploading leads to Salesforce.
Stay tuned for upcoming posts in this series where we will showcase how easily you can build other business processes, such as creating automated service tickets for marketing ops teams within Flows. If you are intrigued by SnapLogic Flows and want to learn more, please sign up here.
Author’s Note (Dec 2022): SnapLogic Flows is no longer available to new customers. We are working to bring the Flows user experience into the SnapLogic Designer.


